This article will explain how to add transactions after the lines are closed and processed.
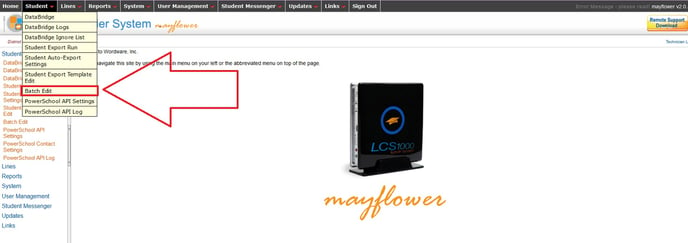
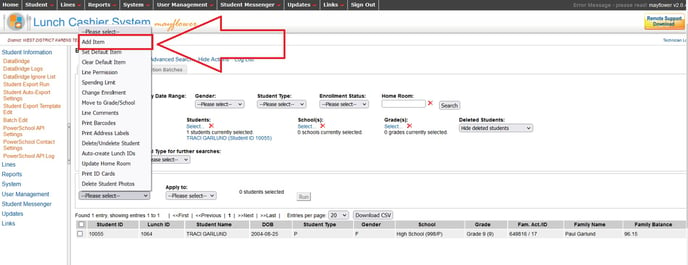
There are times you will find it necessary to add a transaction for the current day (or a previous day) after the serving line has been closed and processed. To do this, log in to your LCS1000 and go to the Students tab>Batch Edit.
Select the Student Batches tab.
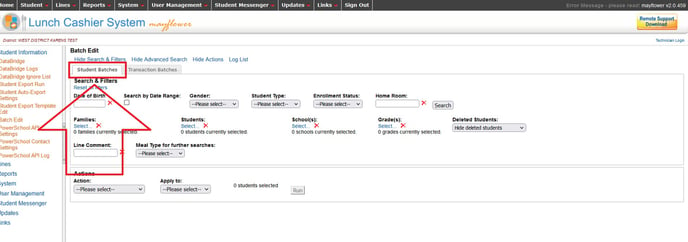
Search for the student(s) who need a transaction added. In most cases, you would use the Student search criteria, although there may be times when you need to add a transaction for an entire grade or classroom. In that case, you would select the appropriate search criteria. For this example, we will use the Student search. Click on Students: select.
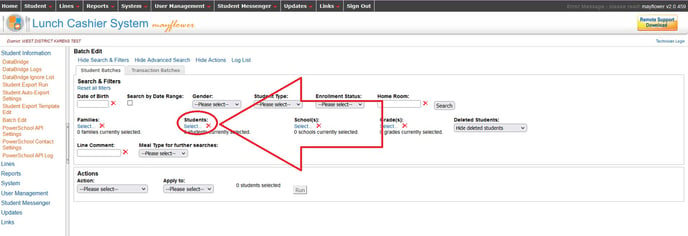
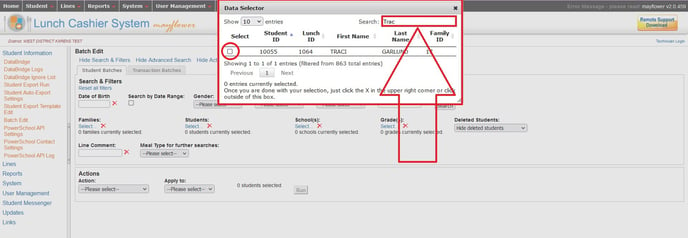
Use the Data Selector box to search for the student by first name, last name, Student ID or Lunch ID. Then, select them by placing a check mark in the box next to their name. If you have other students to add transactions to, clear the search box and continue searching for names and selecting the box next to their names.
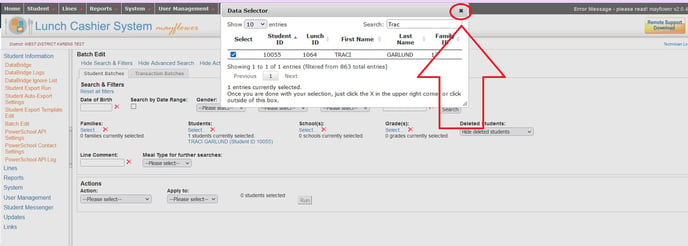
When you are finished making all of your selections, click the "X" in the upper right hand corner of the Data Selector box, to close the box.
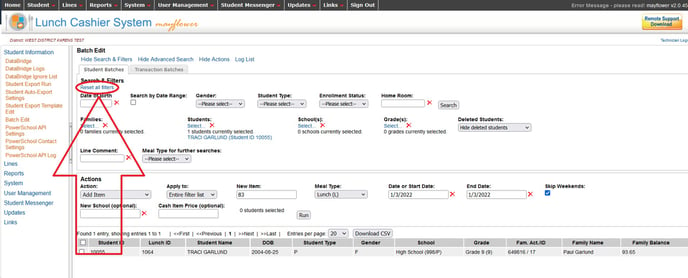
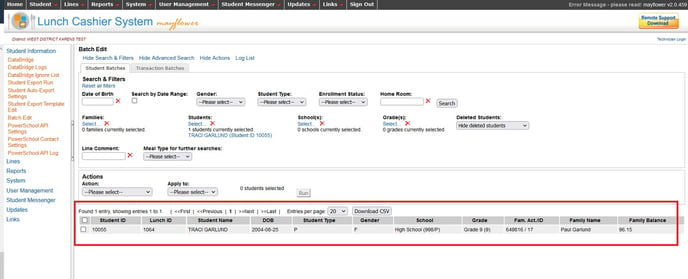
The student(s) you have selected will be listed, as shown in the following screenshot. Now, click the "Search" button.
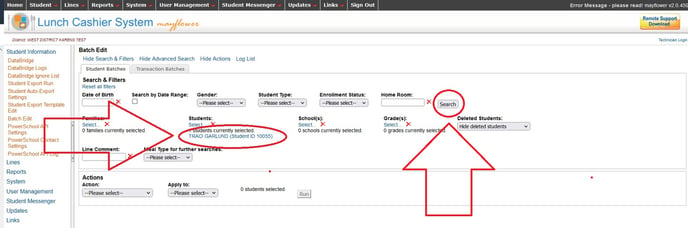
After clicking the Search button:
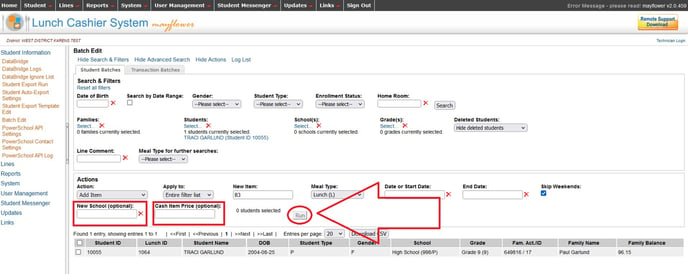
Next, under "Actions" select "Add Item."
Under "Apply to" select either Entire filter list (to add a transaction to everyone on the list) or "Selected Only" (to add a transaction to just the names you select by using the check boxes.)
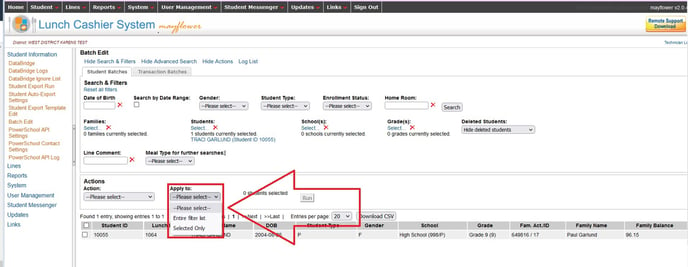
For this example, I will chose "Entire filter list" because I only have one student on the list.
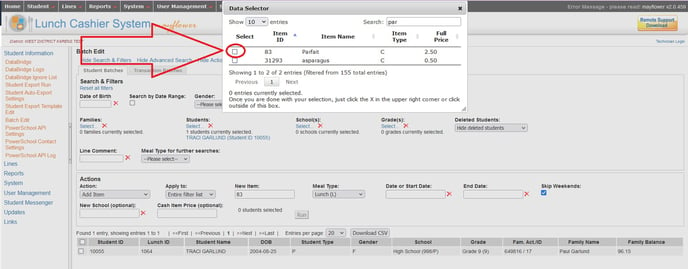
Click in the "New Item" box to bring up a data selector box. Use the Search box to search for the item you wish to add.

Place a check mark in the box, next to the item you wish to add. The Data Selector box will close.
Select a Meal Type, then enter the dates or date range. If you want to add the item just to one day, enter the same date in both fields.
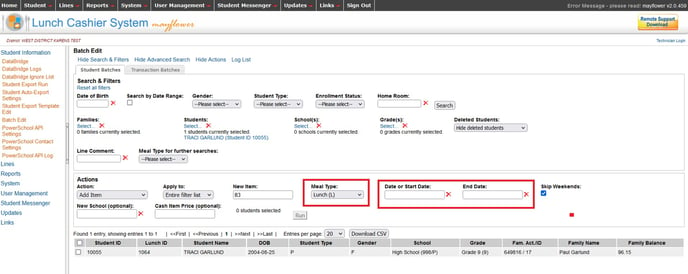
Unless you are adding a cash sale (a sale that is not charged to a specific student or staff member's account) you will not need to put anything in the New School or Cash Item Price fields. Now, click the "Run" button.
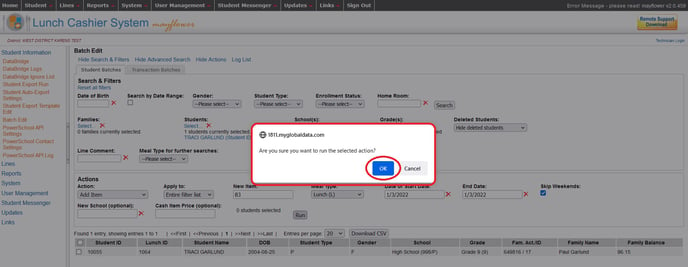
Confirm the action by clicking "OK."
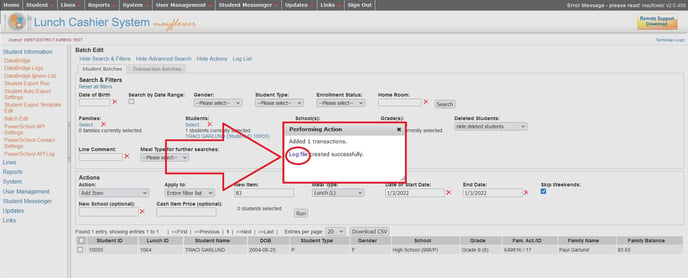
A Performing Action box will appear on your screen. It is VERY IMPORTANT for you to click on the "Log file" link in the box. This is how you check your work.
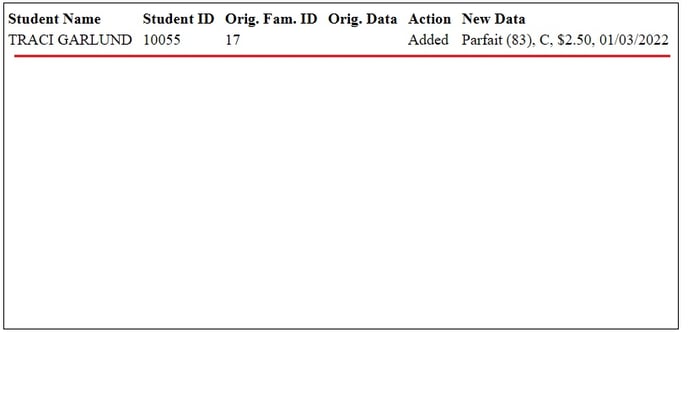
The log file shows one parfait for $2.50 was charged to Traci Garlund on 01/03/2022.
Clicking "Reset all filters" clears out your previous search so you are ready to search again.