
In this article, we will review how to set up a schedule for running the DataBridge.
At this point, we should have a complete file on our sFTP server. If you are unsure if the file is on our sFTP server, please review Step 2 here Step 2 How to transfer your Student Information System data file to Wordware
Please begin by logging into your LCS1000 and going to "System" > "Data File Upload Settings."
There are two settings on this page, one for uploading a file and one for downloading a file. We will be working with the second one, "Data File Download Settings."

Put the filename and extension in the first box on the left. This is just an example; your filename will be different from this one. The second box should be "import," just as in this picture. Check the Active box and then click Save.
Next, go to "System" > "Auto-DataBridge Settings"
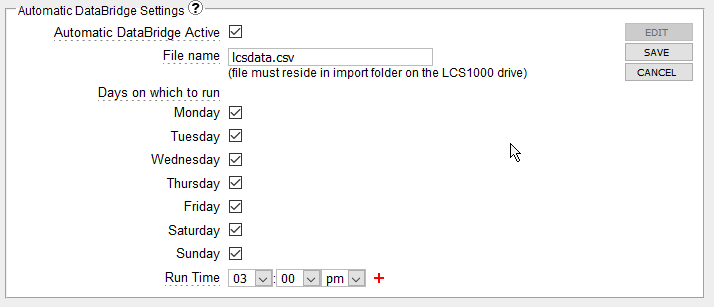
The "Filename" should be the name of your SIS file. It should be the same as the "Data File Download Settings" from above. Then check the box next to the days you like this to run. Run Time is the time you would like the system to process the file. Be sure to set this after the time that your file arrives. For example, if the file is created at 11:00 pm, set the Run Time to 1:00 am. This will allow the system enough time. You can also set multiple Run Times throughout the day. To ensure that the data has enough time to load and sync, we recommend putting two hours between each Run Time.
Check the Active box and click Save. Note: The best way to disable the DataBridge from running is to uncheck the "Automatic DataBridge Active" box and click save until you wish for the system to run again.
Next we will import the file How to set up a DataBridge Template