
Guide to using Tuition module, including creating/editing/deleting items, forms, payment plans, contract templates, revisions, etc
The following addresses common usage of the Tuition module. For questions or concerns not found here please look over our other Knowledge Base articles or ask our support staff.
The following topics are covered here. Click on the link to be directed to that topic.
Adding Tuition Items
Tuition Items will form the basis of a tuition contract which you can assign to students.
To create a Tuition Item, go to the Items Tab. Select Tuition Items. Your action will be to Add New Tuition Item.
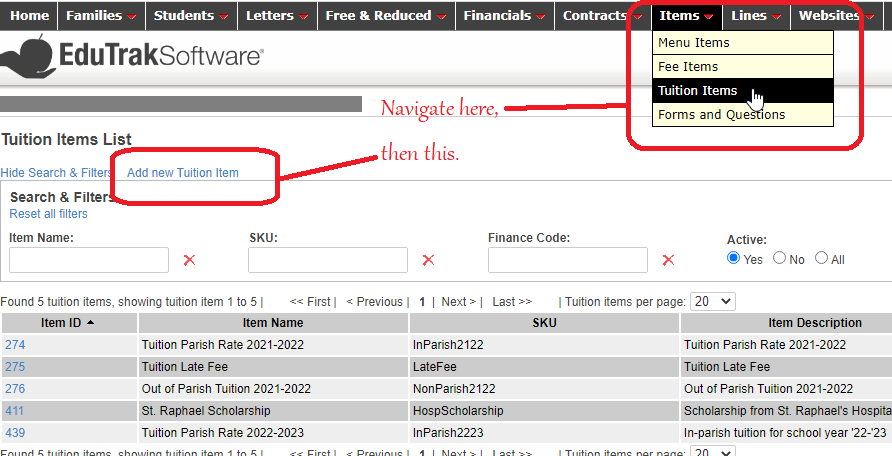
Input the Item Name, Price, and Finance Code. You can also give it a SKU and description, if desired. Click SAVE.

Forms and Questions
To create forms with questions or other content to add to your Tuition item, go to Items-->Forms and Questions and click Add New Form.

Name the new form then click Add Content to build the form.

Preview your form after adding or deleting content by clicking the Preview Form button.

Once you're satisfied with the content of that form, click Save Form.

Editing an existing form
Edit an existing form by clicking on the form in the left menu you and using the same process. You can create additional content and/or delete content (by clicking the red X for that content) then resave the form with the changes.
Creating Form Groups
You can combine smaller/simpler forms into one large form (Form Group). This way you can create simple forms with commonly-used questions/content and mix them together as needed for new forms.
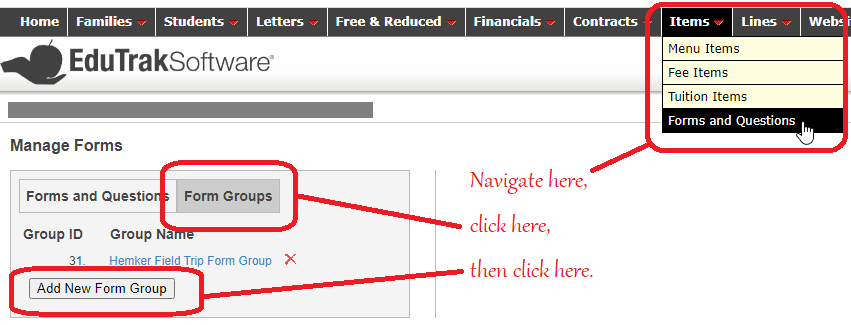
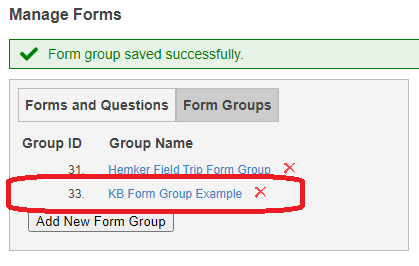
To create a Form Group, go to Items-->Forms and Questions and click on Form Groups, then Add New Form Group.
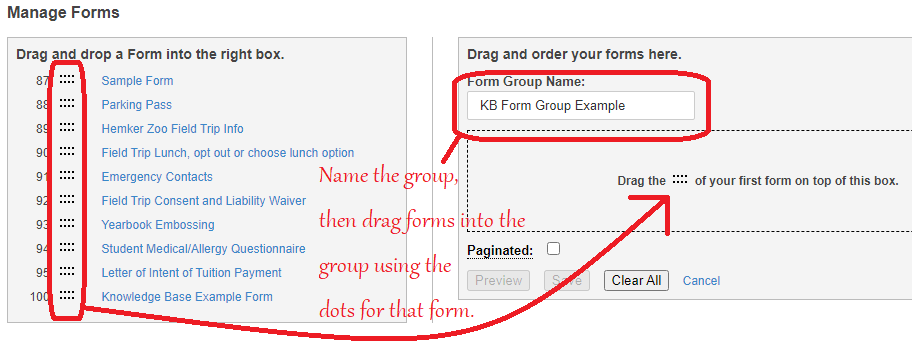
Name your new group, then drag the forms you want in that group over to the box on the right using the grouping of dots that corresponds to that form.
Tip: while dragging additional forms, look for the white space below an existing form on the list to drop the next one into.
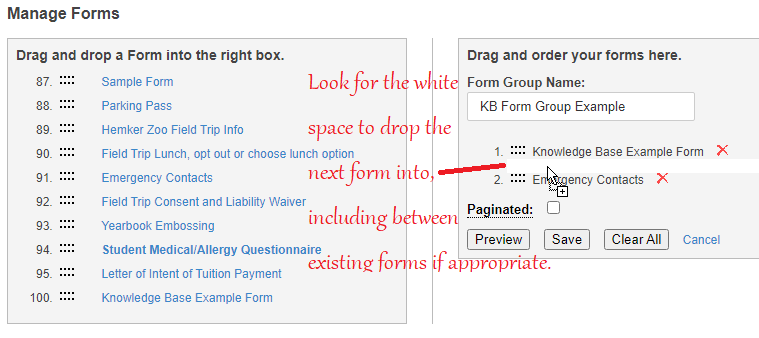
Choose whether to paginate the group...
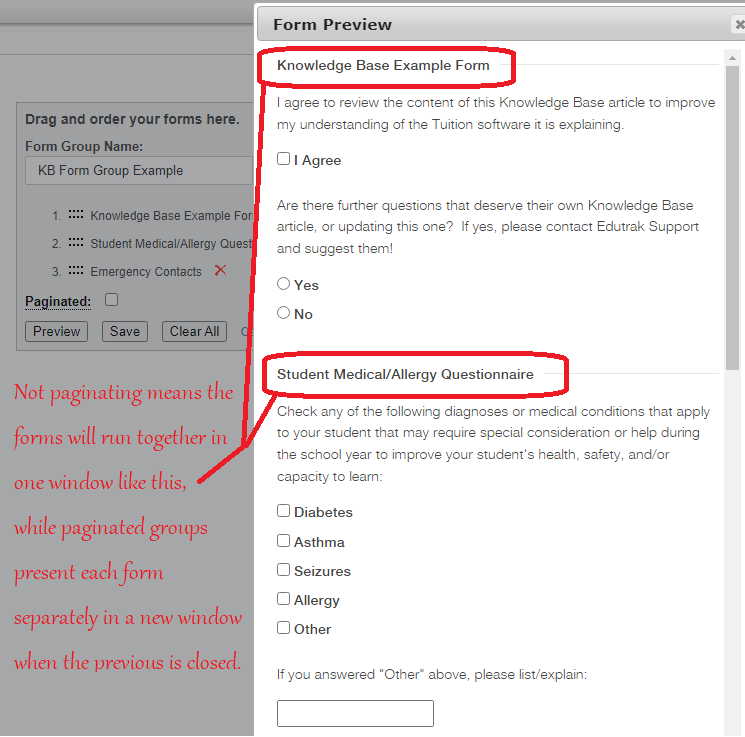
...then Save it.

Adding a Payment Plan
To create a contract with your tuition items, you will need one or more payment plans through which the contract can be paid. The following are some of the options for those plans.
Paid in Full
Go to Contracts-->Payment Plans, then click Add New Payment Plan.

Name the plan appropriately, click the Pay in Full radio button, then click Add.

Monthly/Bimonthly/Quarterly/etc
As above, but instead of Paid in Full, choose Monthly.
Name the payment plan, then in Frequency select the number of months between payments (choose 1 for monthly, 2 for bimonthly, 3 for quarterly, etc).
Maximum Payment Day is the last day of the month you will accept payment that month (the contract payee can only select up to that date for their payment date), and is optional.
Minimum Due and Maximum Due are also optional fields. Only contract payees who owe a total amount greater than (Minimum Due) or less than (Maximum Due) the amount you enter will see this payment plan as an option during checkout.
You can also select the check boxes to Allow partial payments (allows parents to pay only part of what is owed) or Require Automatic Payment Setup on Signing (requires contract payee to set up automatic payments while signing the contract).

Custom
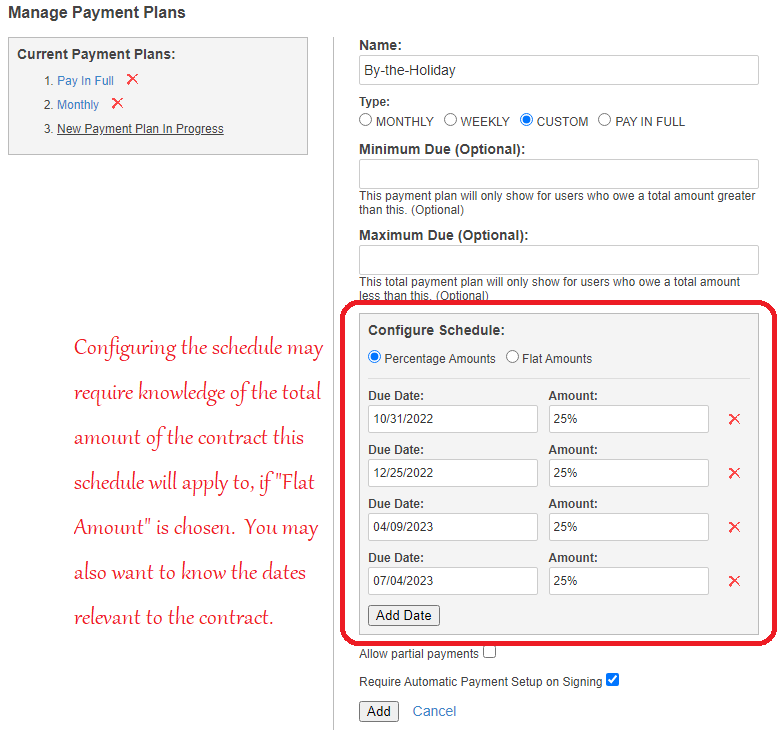
As above, but select Custom.
In addition to the above optional choices, you will need to configure a schedule for payments. To do this, click Add Date for each due payment, and select whether the payments will be in Flat Amounts or in Percentage Amounts of the total, then in Amount select the percentage or the dollar amount that will be assessed on each date (remember the percent total must be 100% and you may need to know the total dollar amount of the contract if you want to have specific dollar amounts paid).
Contract Templates
Creating a contract template allows you to bundle together items, forms/form groups, and payment plans to assign all at once. You can also modify these templates as you assign them, meaning they are still flexible enough that you don't need to create many variations based on small situational differences, though you can if preferred.
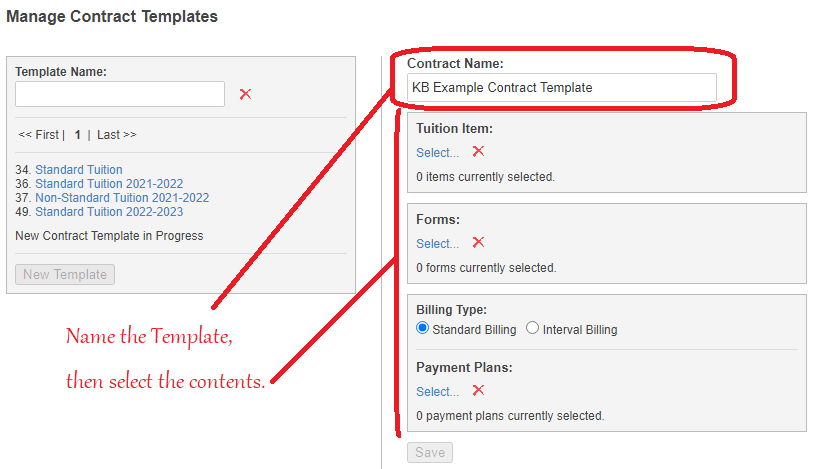
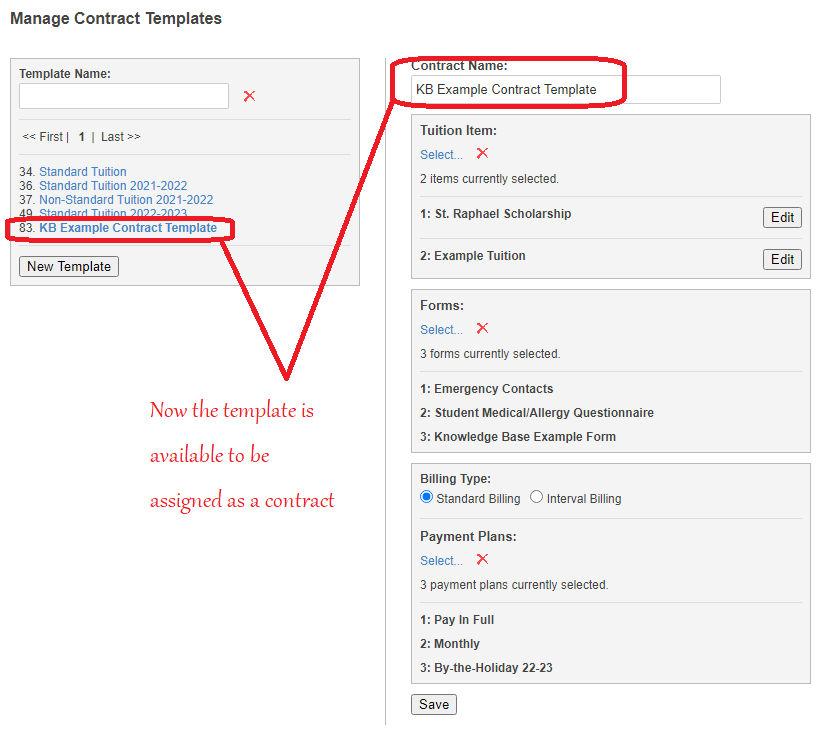
Go to Contracts-->Contract Templates. Click on New Template.

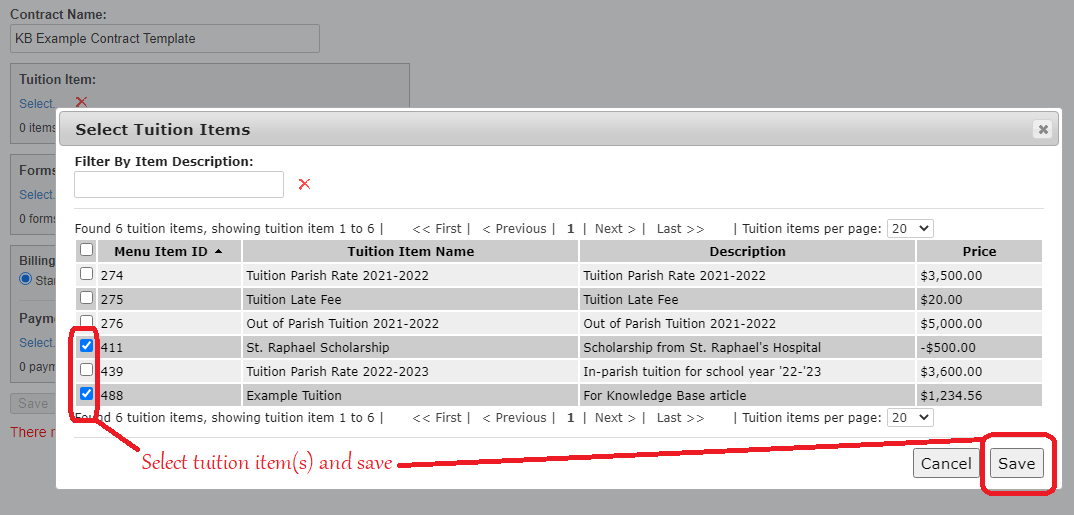
Name the template, then select the item/s, form/s (optional), and payment details contained in the template, including any payment plans you want the contract payee to have available when they sign the contract.


Then Save the contract template.

Assigning a Contract
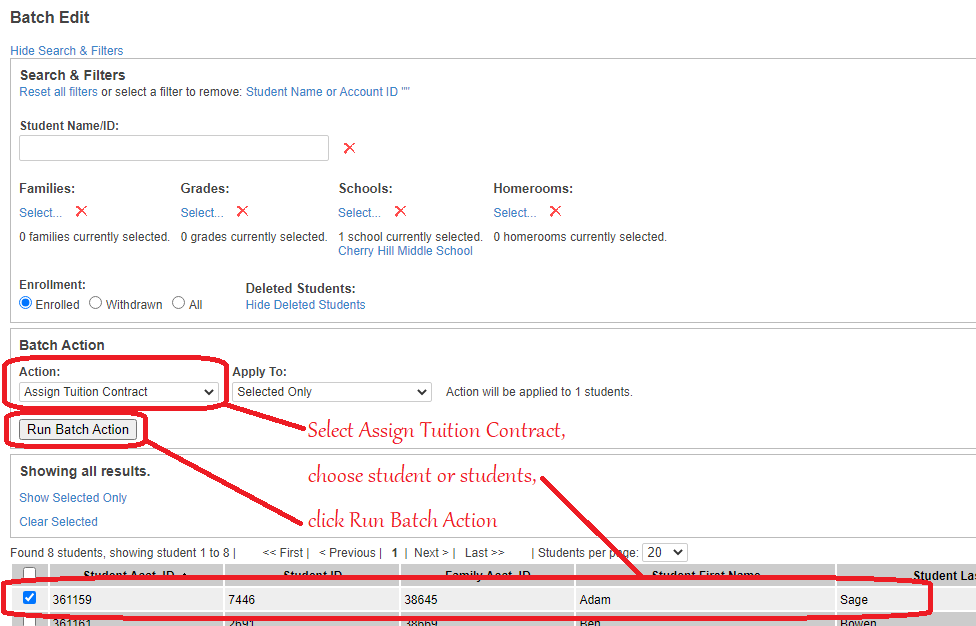
To assign contracts to students to be reviewed and signed by the contract payee, go to Students-->Batch Edit.

For more information on using the Batch Editor, see Using the Batch Editor.
Here we will select the action Assign Tuition Contract, choose a student or list of students, then click Run Batch Action.
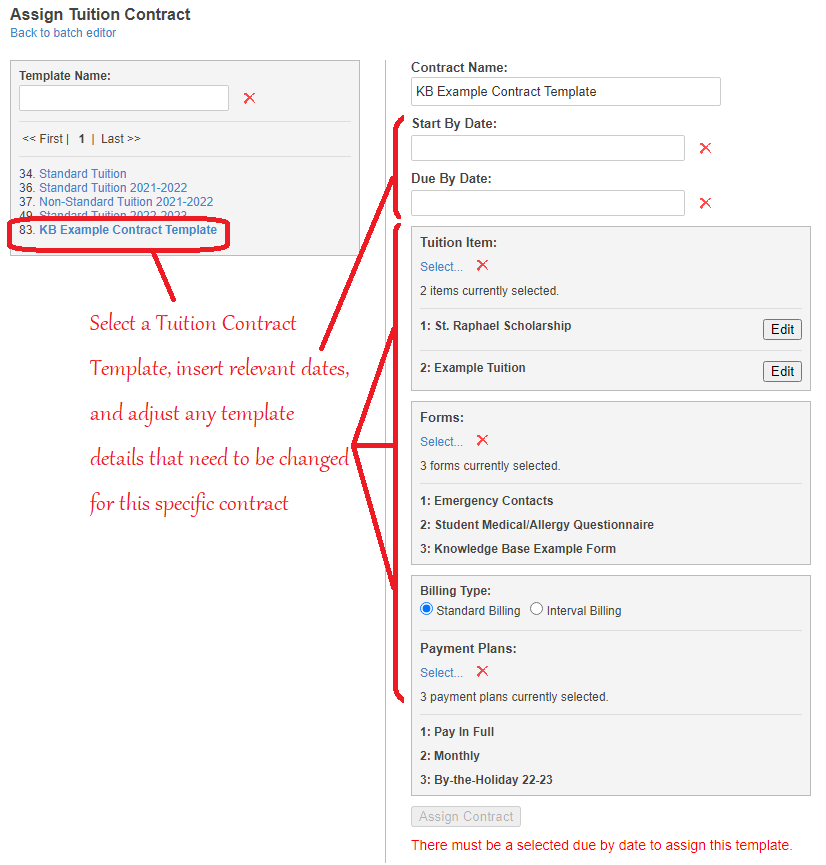
There we will select the template we want to assign, input the Start By Date and End By Date, then tweak any details of the template that need to be changed for this specific contract (or set of contracts). Finally, click Assign Contract and confirm the action.

Signing a Contract as Admin
Once the contract has been assigned, it must be signed before invoices can be generated or payments can be made. The contract payee can sign the contract or it can be signed by an Admin from within the District Site.
To sign a contract as an Admin, go to Contracts-->Contracts, search for the contract to be signed, then click on the Contract ID of that contract.

This opens the Contract Details page for that contract in a new tab.
Once there, click Sign Contract.

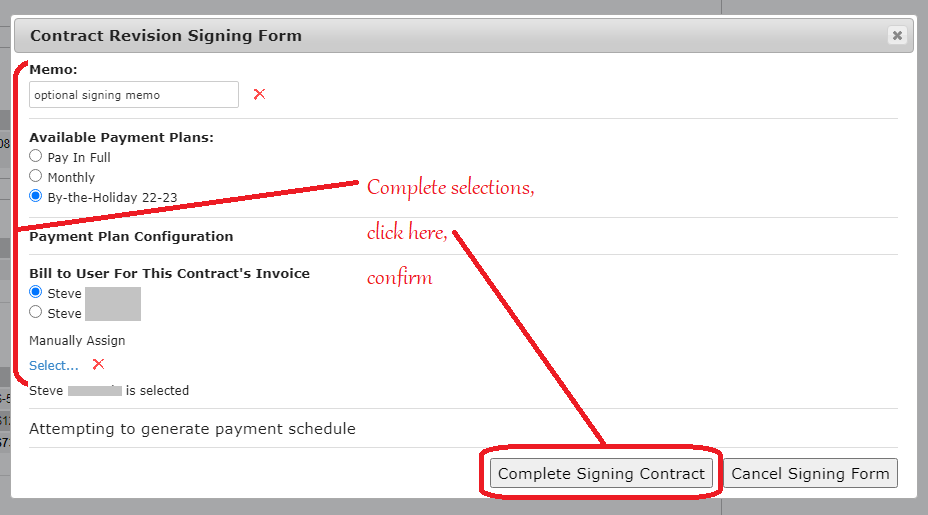
This creates a pop-up/modal window that prompts for an optional Memo, to select from the Available Payment Plans (including Payment Plan Configuration such as the Billing Date, when applicable), and Bill to User For This Contract's Invoice (which presents the student's associated users and an option to manually assign any user). Once you have at least selected the payment plan and bill-to user, click Complete Signing Contract and confirm to sign as Admin.
Editing a Contract
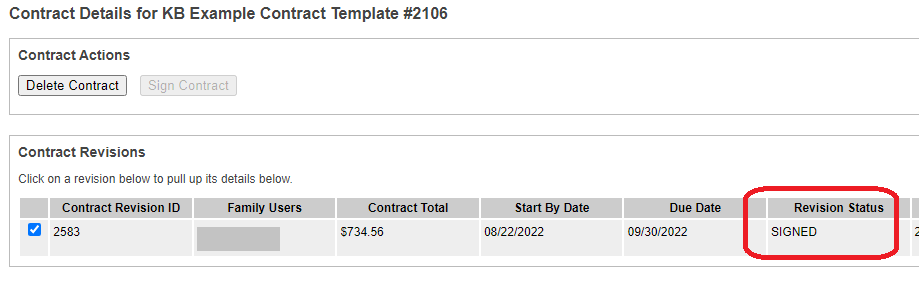
If it is necessary to edit an existing contract, go to the contract (as above) and scroll down until you find the Edit Signed Contract Revision button and click it.
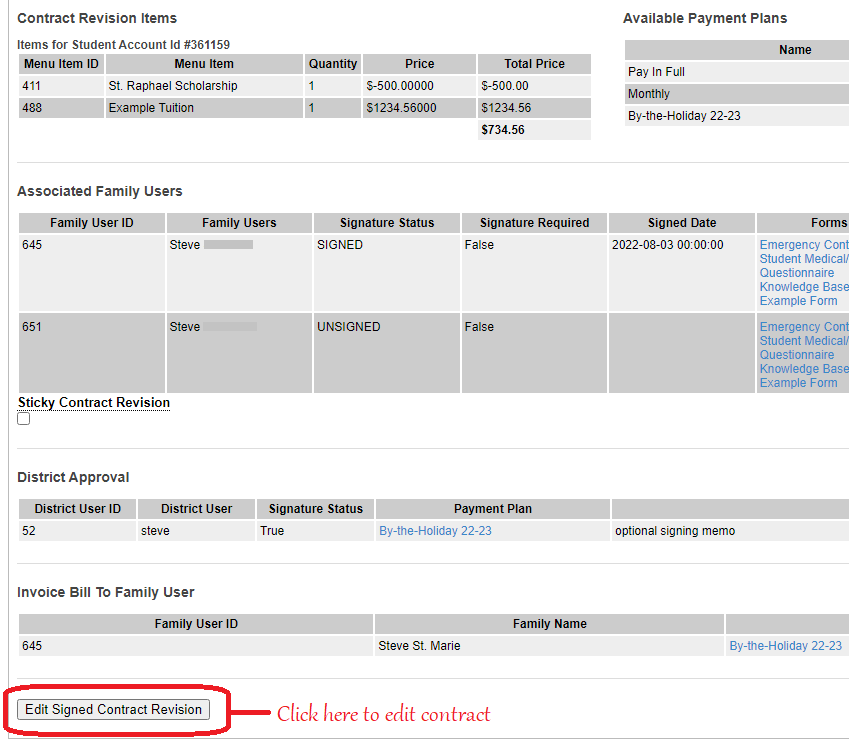

Confirming this negates the original contract, then "copies" the original contract into a new contract revision which can be changed and then re-signed. To make those changes, click on the new button that appeared in the same place called Edit Contract Revision.

Now many of the aspects of the contract can be changed from within the Contract Details page. Red X's delete things that exist, blue field entries (Price, Quantity) can be changed by simply clicking on them, and other blue "Select" options allow adding new students/payment plans/etc. Even the Contract Name can be edited.
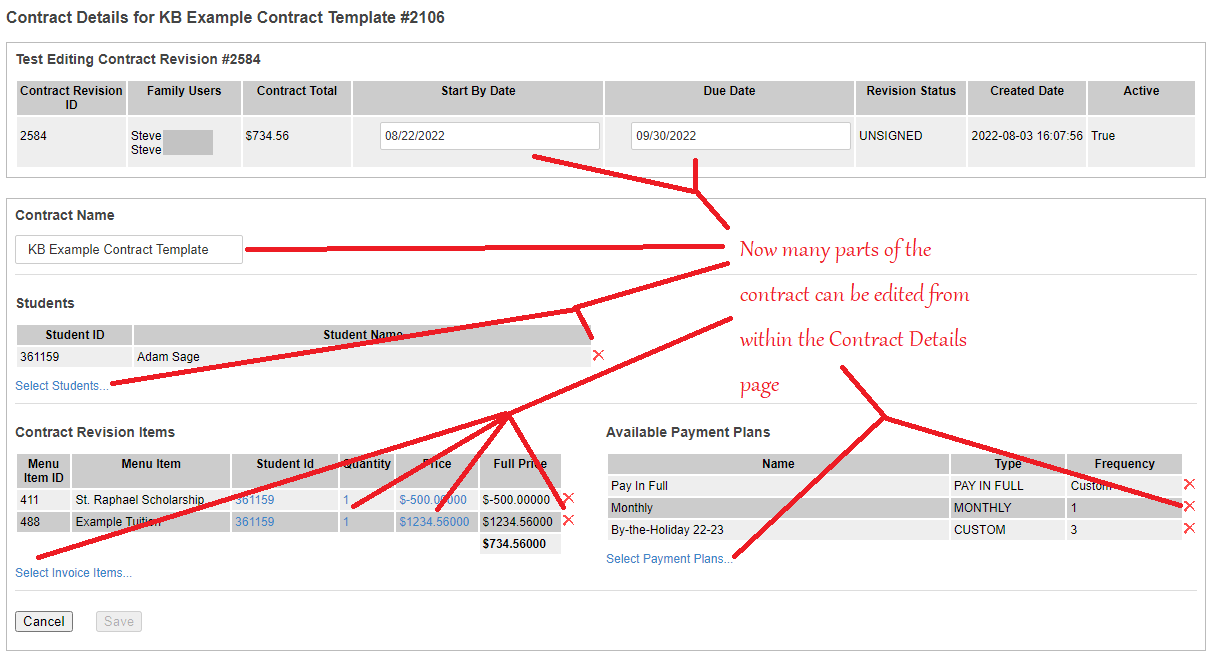
After making the changes, click Save.

The prompt that follows gives options to sign while saving (Save & QuickSign) or Save Unsigned so that further changes can be made before signing, potentially by the contract payee (such as a different payment plan option).

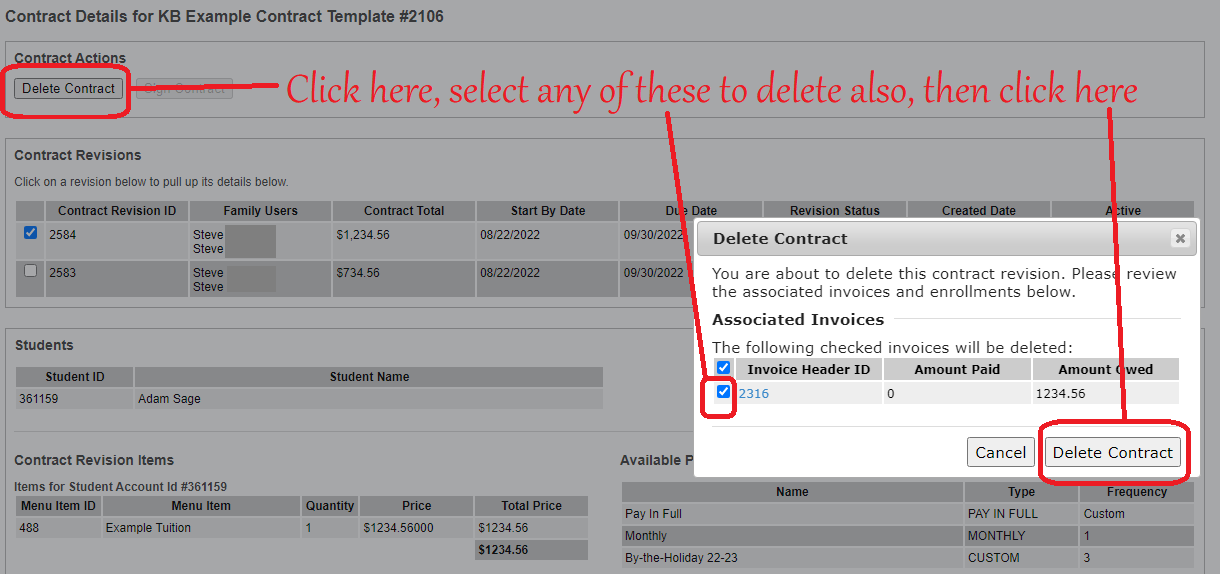
Deleting a Contract
To delete a contract, go to Contracts-->Contracts and select the contract to be deleted (as above).
In the Contract Actions section of the Contract Details, click the Delete Contract button. There will then be a prompt asking if you also want to delete any invoice(s) associated with the contract. If you want to delete one or more (or all) of the associated invoices, select them with the checkboxes and then click Delete Contract to confirm.

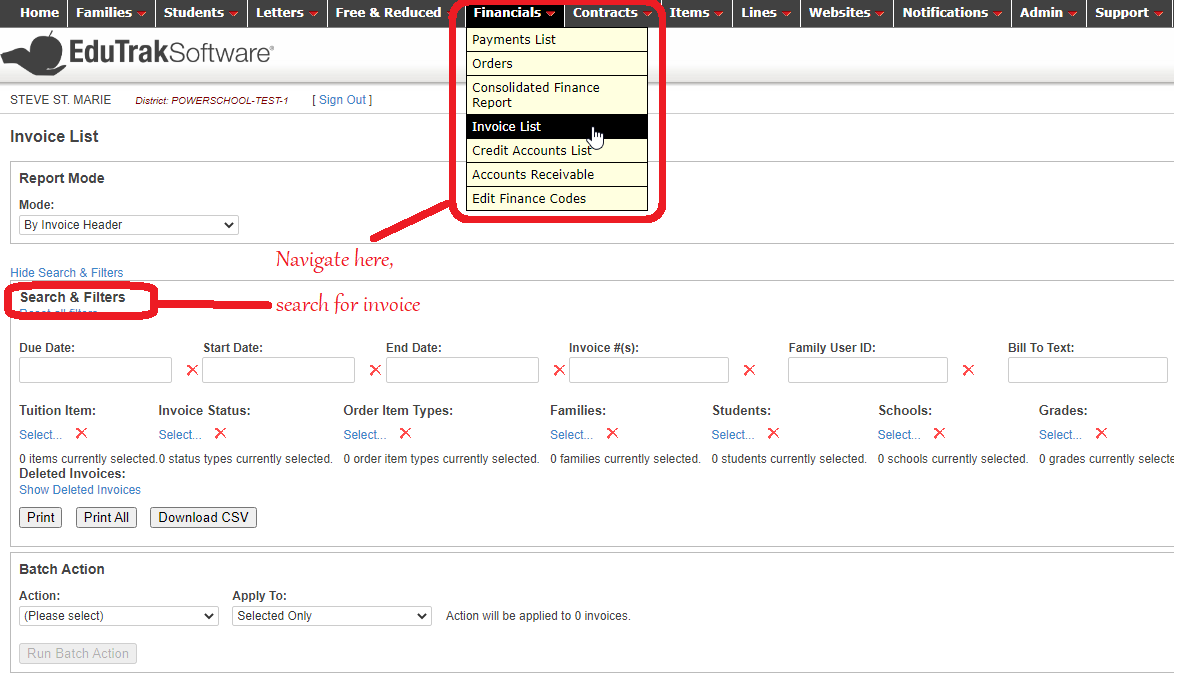
Applying a Payment in Office
To apply a payment as Admin, go to Financials-->Invoice List and use the search to find the invoice to be paid.
Once you've navigated to the invoice, click Apply Payment.
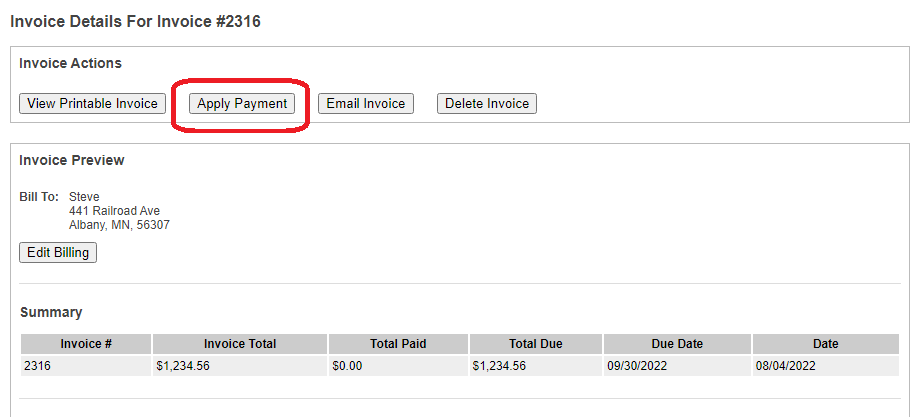
Input the Amount Paid, then click Start Payment Process.

Choose the Funding Source Type, include any necessary details (check number, etc), and click Finalize Payment.
