
Best practices for handling products and settings between one school year and the next in eStore/ePayTrak
Updating the Powerschool Year (Powerschool API users)
Procedure
There is no official/necessary/required process, but there are best practices you can use to tie up the last school year and begin the next one with fewer concerns.
In roughly chronological order of when they're best to do, these include:
- Once any product in your store is no longer necessary (for any reason, but often due to being tied to a school year that just concluded):
- if the same or sufficiently similar product will be offered the following year, copy the product (see below for details) and set it to "Hidden" (so that families don’t see it as an option in the store until you’ve had a chance to update it)
- once copied, or if the product will not be offered again, archive the old product (see below for details)
- Update your copied products to reflect the current year, including names, descriptions, attached product templates and forms, and any changes in how you want the product to work in the store
- Set your Hidden products and categories to Public when you want families to have access to them in the store
This process will help avoid products that can’t be purchased due to being set to “Single Purchase per Student” but purchased in the previous school year, re-using outdated products with previous years’ information, and other problems that detract from your school’s experience of your eStore/ePayTrak site.
Copying a Product
To copy an existing product, find the "Copy Product to Sku" line just above the product name while editing the product in the Admin site. Decide on the new SKU the new product you're creating from the copy should have and enter that into the "Copy Product to Sku" field, then click the "Copy" button to the right.
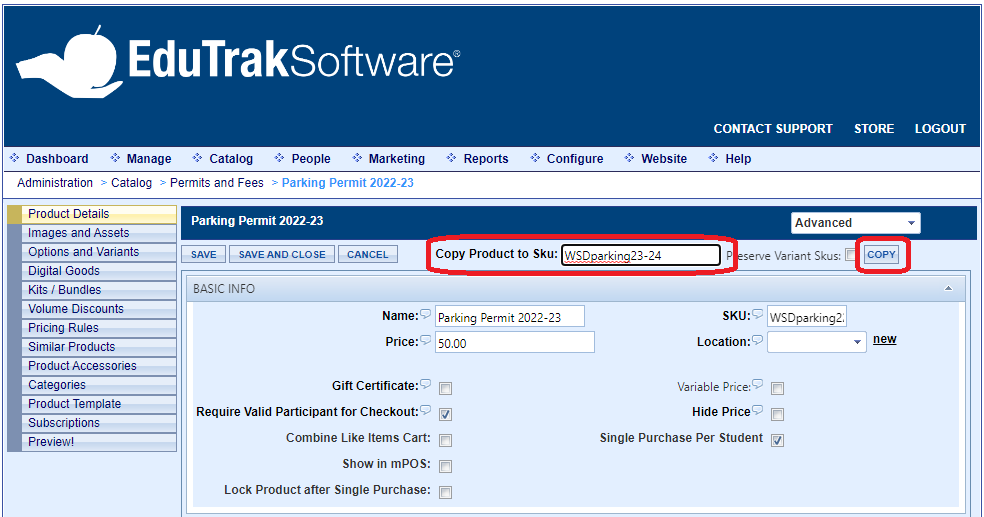
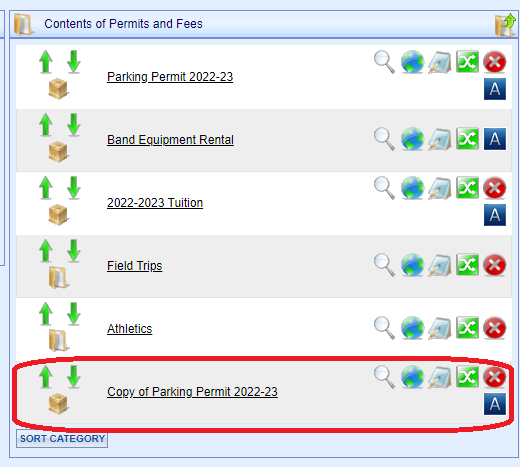
This will take you back to the category the original/copied product was in and will create a new product named "Copy of [name of original product]" that has all of the properties and settings of the copied product except for the name and the new SKU you chose. You can go into that product's editing and make whatever changes are necessary to create the new product you need, including the name and even the SKU (which you can change until someone purchases the product, at which point it becomes unable to be edited).
To officially Archive a product, use the blue Archive button on the right-most side of the product line while viewing it in the Admin site under Category-->Browse. If needed, this can be retrieved and moved back into your catalog, but it will not show anywhere but the Archive and cannot be purchased.

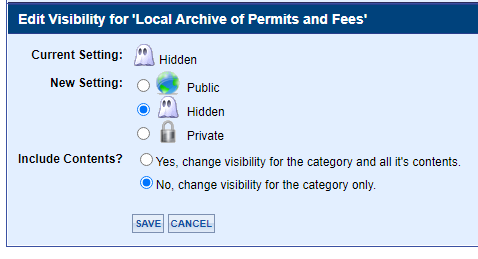
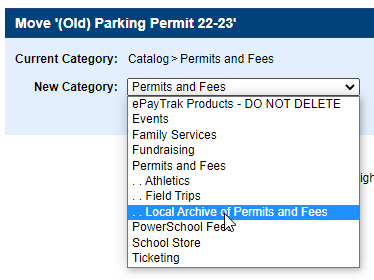
Alternatively, if preferred, you can create your own "no-longer-used" category/categories to stow the old product in if it helps you keep track, but be sure to set the category/categories to hidden and the product(s) to "Private" so the category cannot be seen by the public and the product cannot be seen or purchased.


Updating the Powerschool Year
For eStore accounts with a Powerschool API, there is an additional step when rolling over from one school year to another: setting your Powerschool Year so Powerschool knows which schoolyear to write payments of Powerschool-generated fees to when paid through eStore.
Under Configure-->Store, open the Powerschool Integration Settings subsection, where you'll see the following:
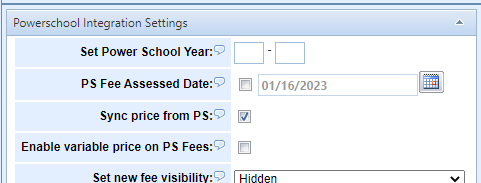
The boxes labeled "Set Power School Year" should contain the last two digits of the first calendar year of the current school year and the last two digits of the second calendar year of the current school year (ex: 22-23).
When these have been updated, save the setting by clicking Save at the bottom of the page.